# CloudWatch Log Group & Eventbridge Rule

{% hint style="success" %}
The **CloudFormation template** for **WorkSpaces Manager** in the **AWS Marketplace** automatically creates an **EventBridge Rule** and a **CloudWatch Log Group** in the same region where the appliance is deployed. The default **CloudWatch Log Group** is called: <mark style="color:red;">**"/aws/events/WorkSpacesAccessLG"**</mark>
{% endhint %}

**Amazon EventBridge** is a serverless event bus service that allows you to respond to changes in your AWS environment or applications. It helps you build event-driven architectures by capturing real-time data from various AWS services, custom applications, or SaaS providers, and routing that data to different targets.

**Amazon CloudWatch Logs**, a service that collects, monitors, and stores log data from AWS resources, applications, and services. A **Log Group** is a container for logs, grouping together logs from similar sources, such as specific applications or AWS services. Within each Log Group, logs are organized into **Log Streams** (individual log files).

EventBridge can send event data to **CloudWatch Logs** for storage and analysis. EventBridge Rules can collect specific insights for Amazon WorkSpaces that are not available through standard APIs.

## Multi-Region Deployment

When setting up **WorkSpaces Manager** to operate across multiple regions, it’s essential to have an **EventBridge Rule** linked to a **CloudWatch Log Group** in each region where WorkSpaces are deployed. The only caveat is that the **CloudWatch Log Group** must have the exact same name in every region: <mark style="color:red;">**"/aws/events/WorkSpacesAccessLG"**</mark>.

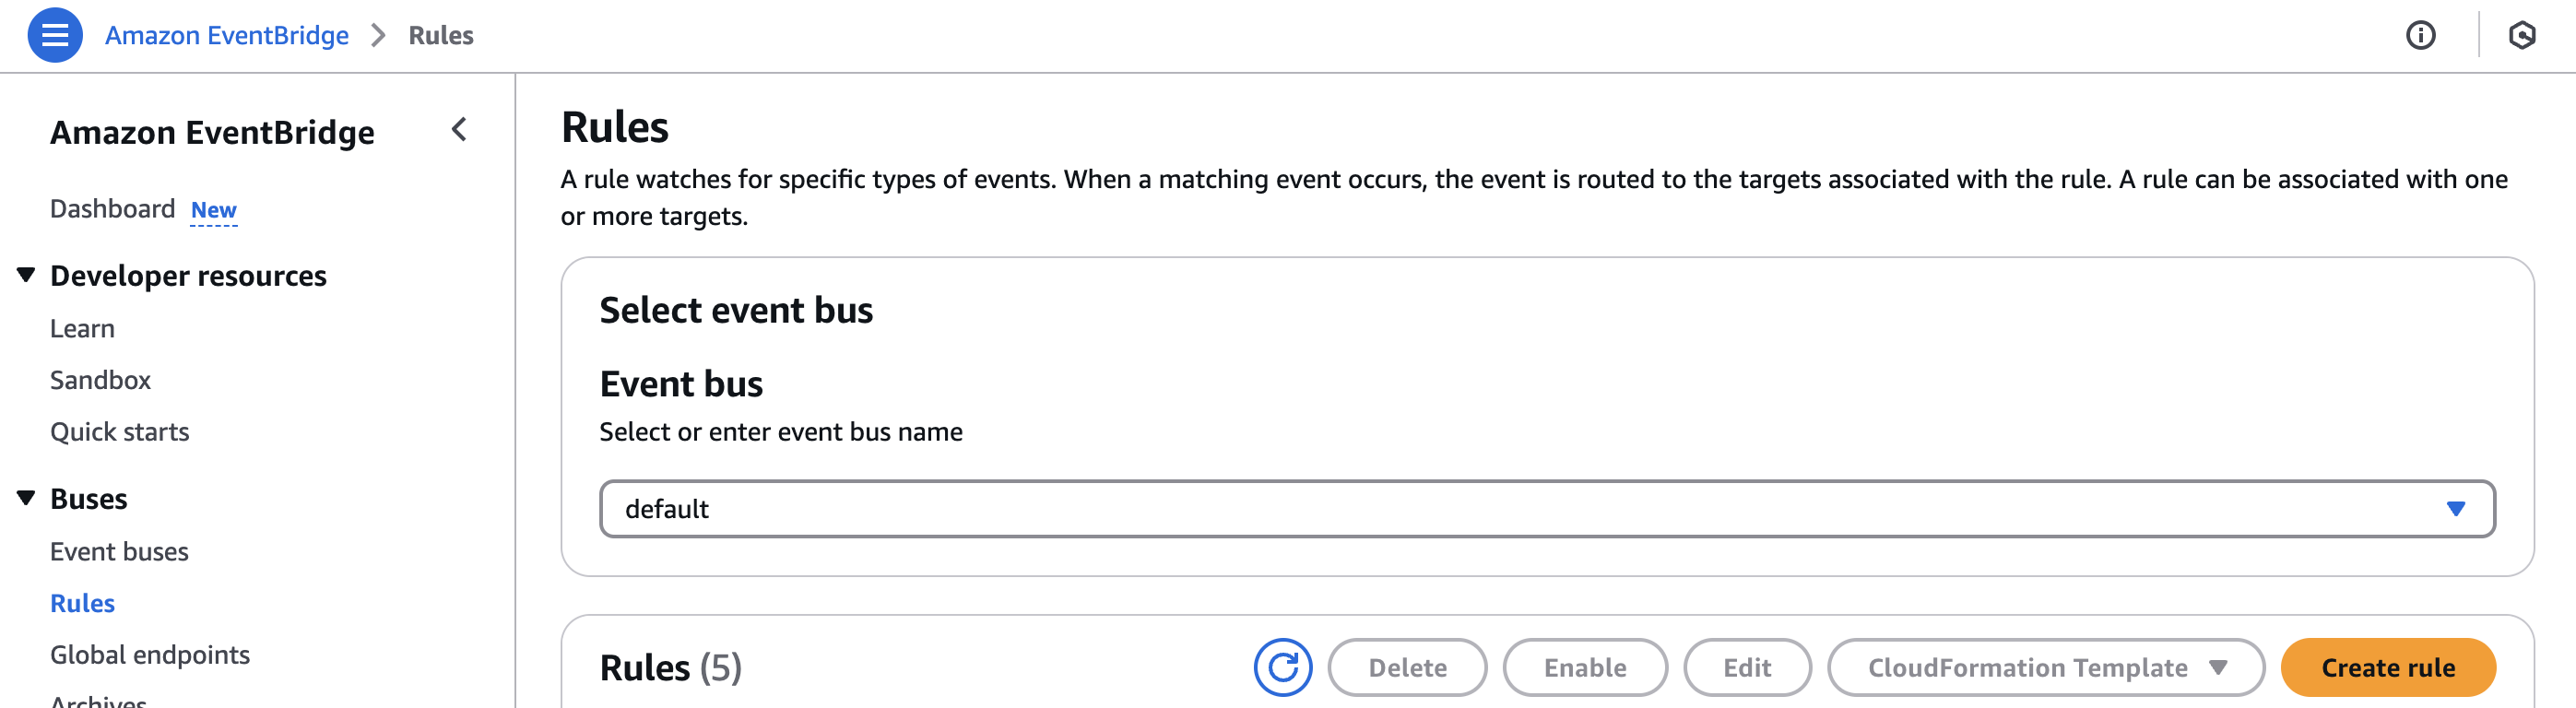
To create new **Rules** and a **CloudWatch Log Group** in a different region from where WorkSpaces Manager was deployed via the **CloudFormation template**, navigate to EventBridge. Click on "Buses" > "Rules":

<figure><img src="https://1977539604-files.gitbook.io/~/files/v0/b/gitbook-x-prod.appspot.com/o/spaces%2F5qADNWBPym2Zh4ZaguCE%2Fuploads%2FRbrssk5OtCAH6x00nJGw%2Fimage.png?alt=media&#x26;token=a68fbc85-9ad1-48b0-8523-f354ab569893" alt=""><figcaption><p>Amazon Eventbridge</p></figcaption></figure>

Click **"Create rule".**

<figure><img src="https://1977539604-files.gitbook.io/~/files/v0/b/gitbook-x-prod.appspot.com/o/spaces%2F5qADNWBPym2Zh4ZaguCE%2Fuploads%2FcWVOi7f1CaVOiAsSrRB5%2Fimage.png?alt=media&#x26;token=5f9955f8-f475-43ec-b5a5-9f52466f2b22" alt=""><figcaption></figcaption></figure>

Rules can be created in two different ways:

1. Visual Rule Builder (selected by default)
2. Standard (preferred)

<figure><img src="https://1977539604-files.gitbook.io/~/files/v0/b/gitbook-x-prod.appspot.com/o/spaces%2F5qADNWBPym2Zh4ZaguCE%2Fuploads%2FT8l4xqpJUlZ9nt8phrF4%2Fimage.png?alt=media&#x26;token=93ec4ff2-1776-4bfd-9576-d4630c4c0799" alt=""><figcaption></figcaption></figure>

We recommend switching off the "**Visual Rule Builder**". If needed, it can still be used by applying the same logic described below for the "**Standard view**". The process is then divided in 5 steps:

1. Define Rule Detail
2. Build Event Pattern
3. Select Target(s)
4. Configure Tags
5. Review and Create

In the **"Rule Detail"** section, add a **Name** and **Description** (e.g., **WorkSpaces\_Rule**) and leave the "default" configuration for the Event Bus, as displayed below:

<figure><img src="https://1977539604-files.gitbook.io/~/files/v0/b/gitbook-x-prod.appspot.com/o/spaces%2F5qADNWBPym2Zh4ZaguCE%2Fuploads%2FArjCbPi1YrL8Ht2oxBxH%2Fimage.png?alt=media&#x26;token=7af29be6-0bcc-4250-a8af-d4ee303ed9db" alt=""><figcaption></figcaption></figure>

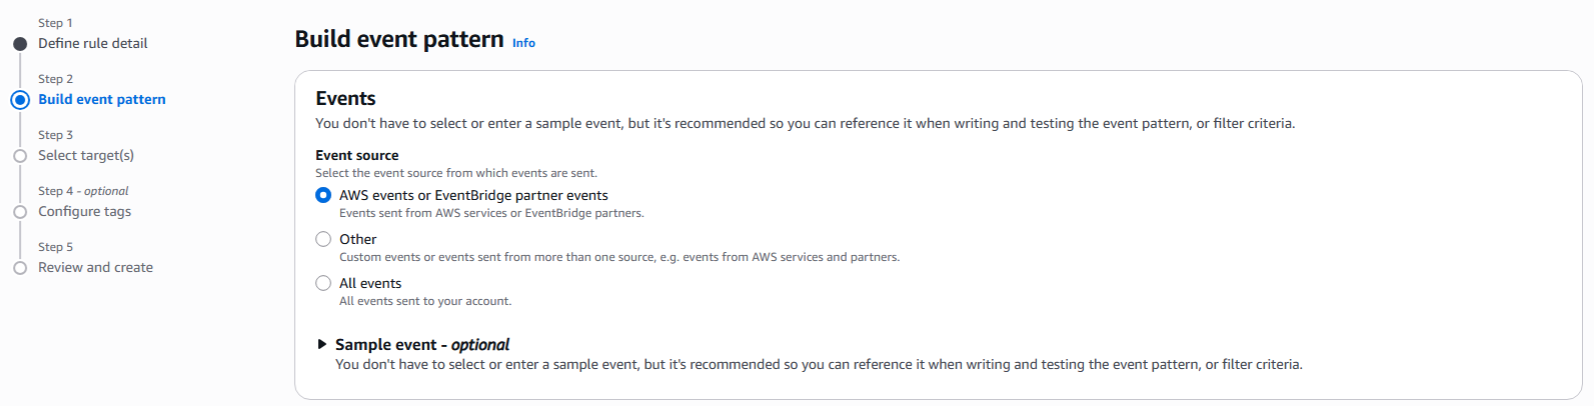
In the **"Events"** section, select **"AWS events or EventBridge partner events"**:

<figure><img src="https://1977539604-files.gitbook.io/~/files/v0/b/gitbook-x-prod.appspot.com/o/spaces%2F5qADNWBPym2Zh4ZaguCE%2Fuploads%2FIFYtzsWHa5LqPRwCeTzp%2FScreenshot%202026-02-11%20151050.png?alt=media&#x26;token=7f3193d2-d67e-4378-a642-684ce90f9045" alt=""><figcaption></figcaption></figure>

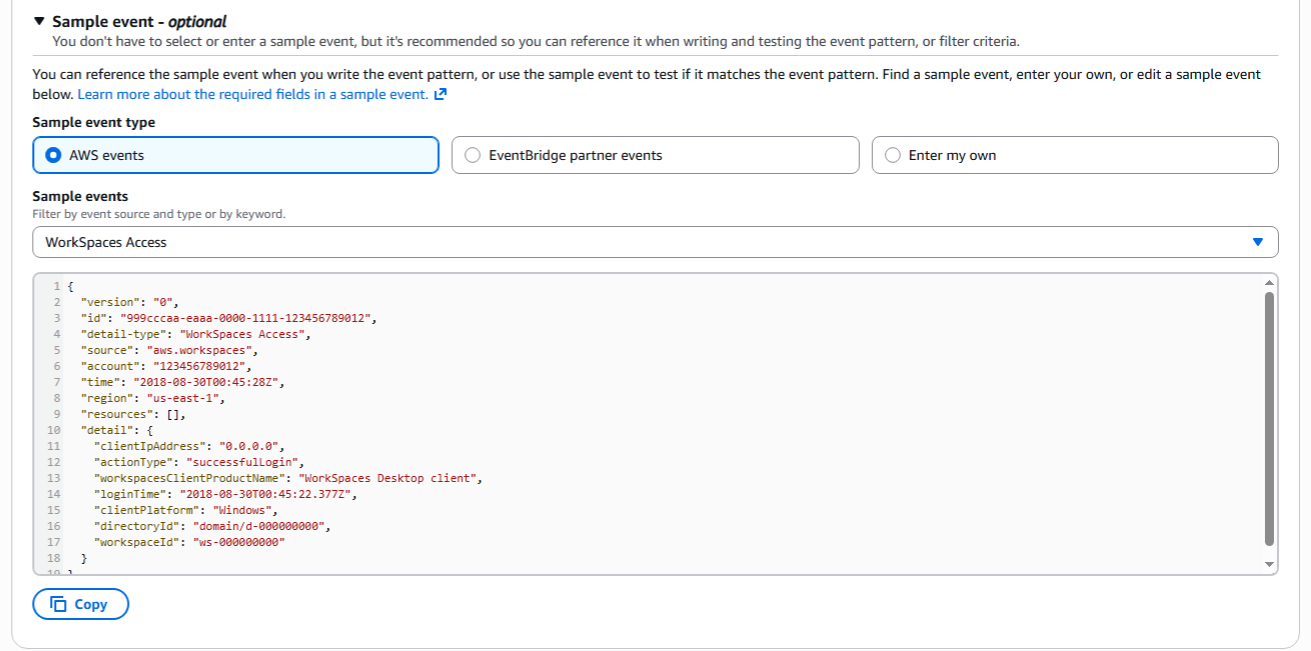
Below, in the **"Sample event - optional"** drop down, select **"AWS Events"** and search for **"WorkSpaces Access."**

<figure><img src="https://1977539604-files.gitbook.io/~/files/v0/b/gitbook-x-prod.appspot.com/o/spaces%2F5qADNWBPym2Zh4ZaguCE%2Fuploads%2Ff5qZX69hbZ9qDTRqWKHp%2FScreenshot%202026-02-11%20151132.png?alt=media&#x26;token=6a98974b-83e1-4c07-acf8-d0541c52d57e" alt=""><figcaption></figcaption></figure>

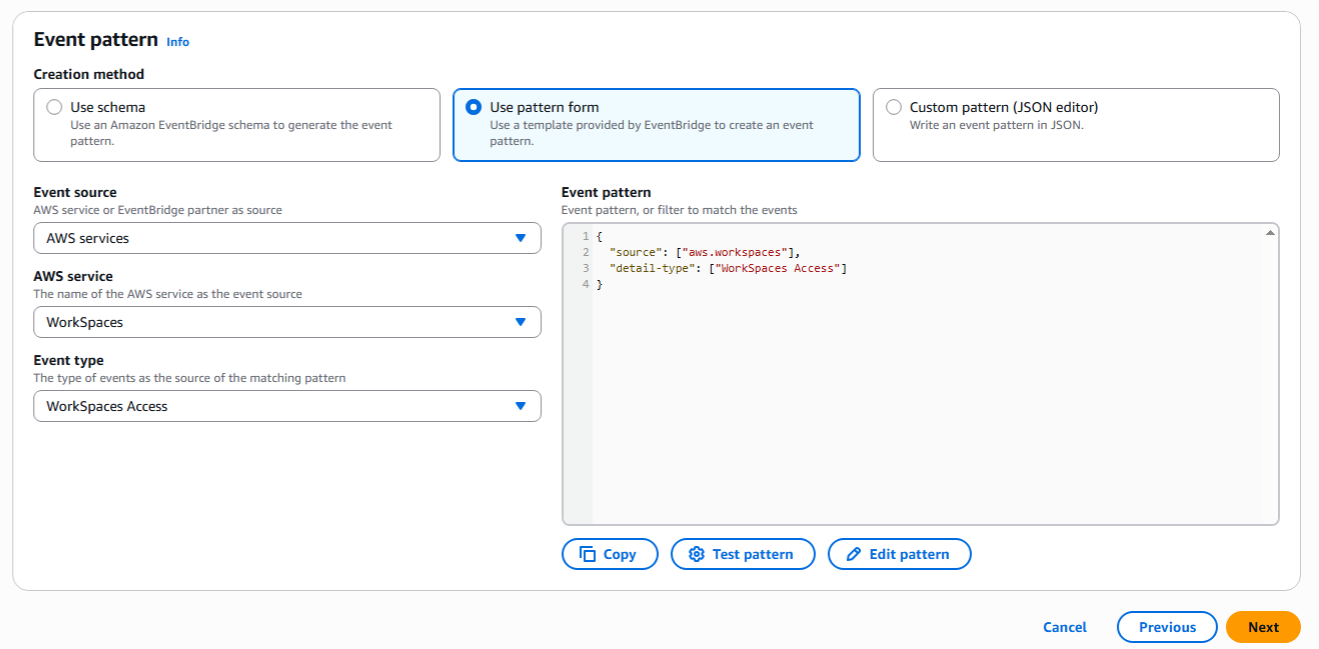
In the last step, under **"Event pattern,"** select the following options:

* **Creation Method: "Use pattern form"**
* **Event Source**: **"AWS Services"**
* **AWS Service**: **"WorkSpaces"**
* **Event Type**: **"WorkSpaces Access"**

<figure><img src="https://1977539604-files.gitbook.io/~/files/v0/b/gitbook-x-prod.appspot.com/o/spaces%2F5qADNWBPym2Zh4ZaguCE%2Fuploads%2FUiJleh2GFGH0n5y3GBd9%2FScreenshot%202026-02-11%20151515.png?alt=media&#x26;token=28824929-7ae1-4bcd-80ea-91ee03c97a3d" alt=""><figcaption></figcaption></figure>

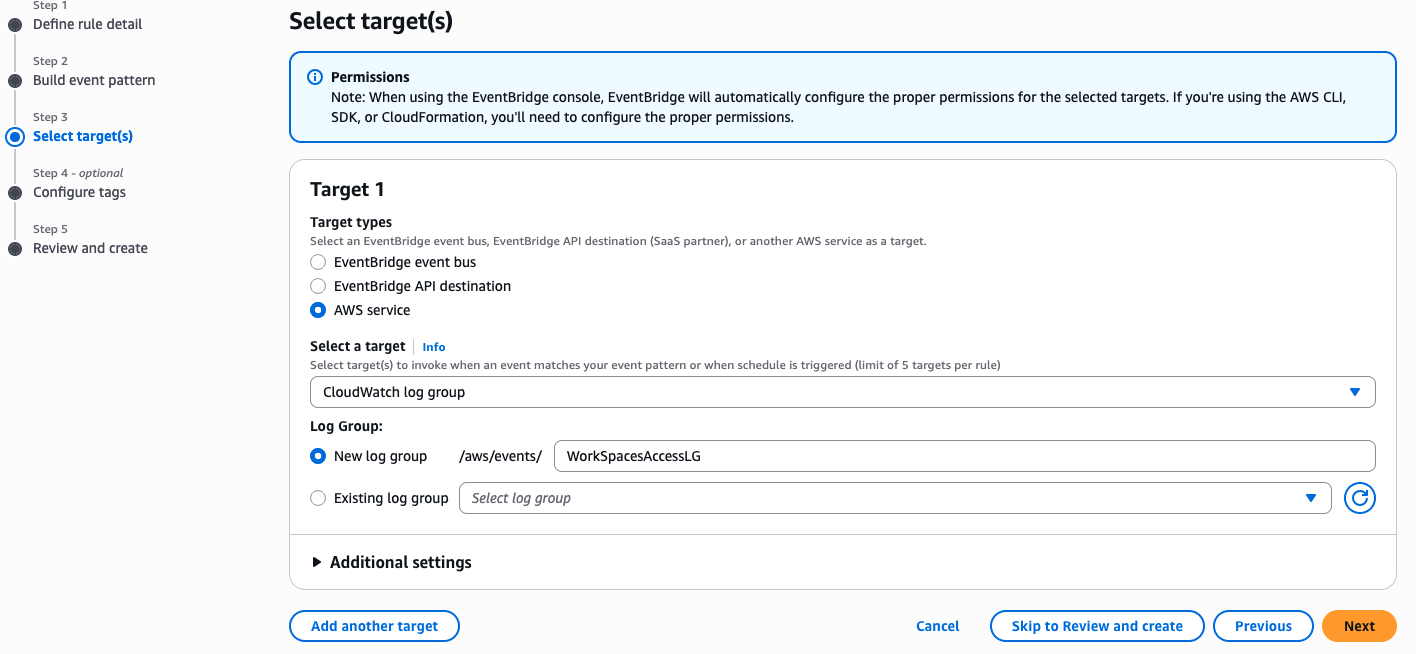
Click on **"Next"**. In the Select Target(s)s section, for **"Target 1"**, choose:

* Target Type: **"AWS Service"**
* Select a target: **"CloudWatch Log Group"**
* Log Group: <mark style="color:red;">**"/aws/events/WorkSpacesAccessLG"**</mark>

<figure><img src="https://1977539604-files.gitbook.io/~/files/v0/b/gitbook-x-prod.appspot.com/o/spaces%2F5qADNWBPym2Zh4ZaguCE%2Fuploads%2FVgmo8mMY8GTWUT6rhYLC%2Fimage.png?alt=media&#x26;token=6a174071-d19b-49bf-926c-fc0ab4180600" alt=""><figcaption></figcaption></figure>

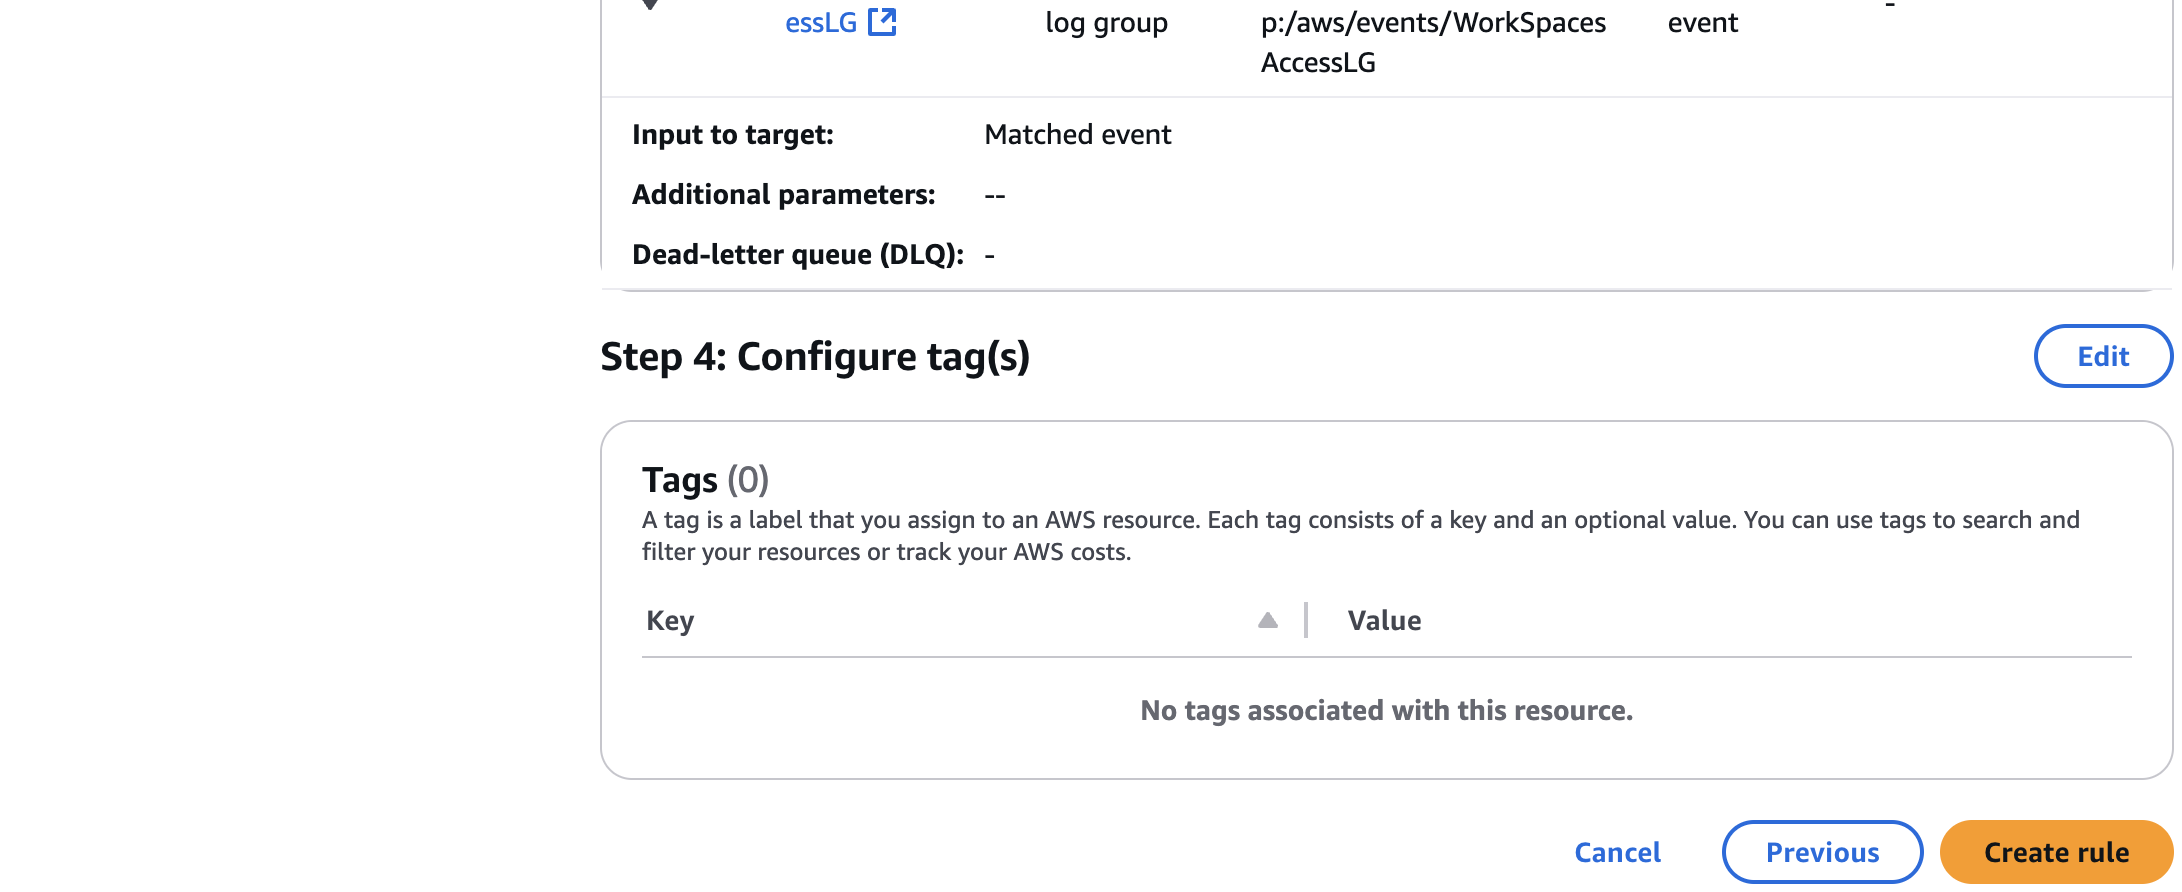
Configure the optional tags as required by your IT Policy.

<figure><img src="https://1977539604-files.gitbook.io/~/files/v0/b/gitbook-x-prod.appspot.com/o/spaces%2F5qADNWBPym2Zh4ZaguCE%2Fuploads%2FS7Uylprsc1b3zm0SdJ14%2Fimage.png?alt=media&#x26;token=62784e3d-e550-4390-b5bb-11838c2a58d4" alt=""><figcaption></figcaption></figure>

And then review and create the rule:

<figure><img src="https://1977539604-files.gitbook.io/~/files/v0/b/gitbook-x-prod.appspot.com/o/spaces%2F5qADNWBPym2Zh4ZaguCE%2Fuploads%2FRwtKGp7BZQYLKHOPNBpK%2Fimage.png?alt=media&#x26;token=07cfad26-121c-4931-a1a5-e97aaacc8e44" alt=""><figcaption></figcaption></figure>

<figure><img src="https://1977539604-files.gitbook.io/~/files/v0/b/gitbook-x-prod.appspot.com/o/spaces%2F5qADNWBPym2Zh4ZaguCE%2Fuploads%2F9pzyuQM4XsSea6Uzbx6P%2Fimage.png?alt=media&#x26;token=8d146f59-16ab-4128-b771-6412e512d788" alt=""><figcaption></figcaption></figure>

A success banner should appear on top of the page.

<figure><img src="https://1977539604-files.gitbook.io/~/files/v0/b/gitbook-x-prod.appspot.com/o/spaces%2F5qADNWBPym2Zh4ZaguCE%2Fuploads%2F8rDBF02wGw6jDkFjkrxI%2Fimage.png?alt=media&#x26;token=eb1871f5-0082-4867-a6e1-1e5138684e92" alt=""><figcaption></figcaption></figure>

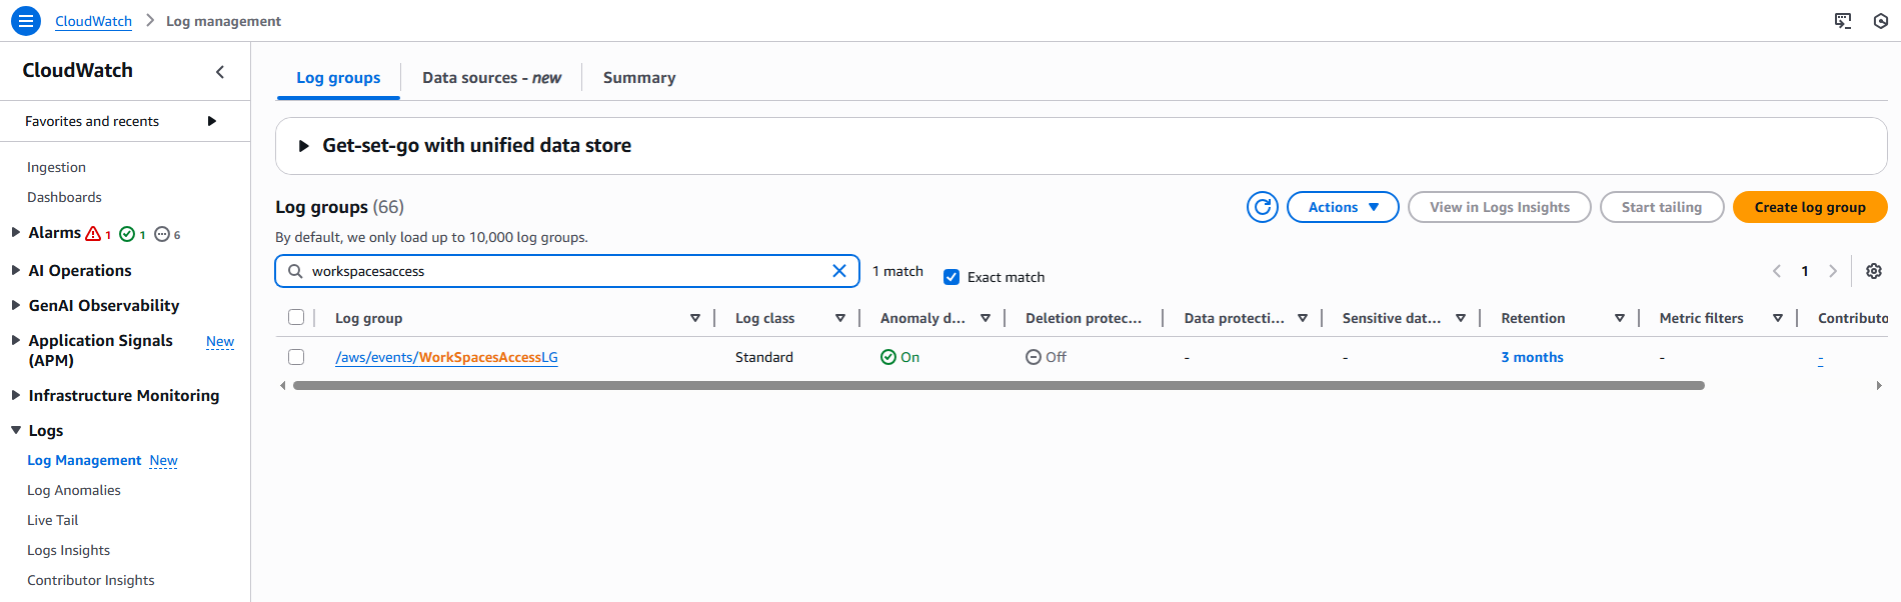
On CloudWatch, click on **“Logs”** > **“Log Management”** > confirm that the new log group exists.

<figure><img src="https://1977539604-files.gitbook.io/~/files/v0/b/gitbook-x-prod.appspot.com/o/spaces%2F5qADNWBPym2Zh4ZaguCE%2Fuploads%2F43kKbQfNuo7qwqvgulgh%2FScreenshot%202026-02-11%20152311.png?alt=media&#x26;token=ad80b80e-2021-4353-8280-8f96c5721abc" alt=""><figcaption></figcaption></figure>

Now, in WorkSpaces Manager, click on the **“Configuration”** drop-down, select **“Settings”**, and then **“Amazon Web Services”** Scroll down to the Account settings and select account, fill in the **“Access Log Group”** field with the following information: `/aws/events/WorkSpacesAccessLG`.

<figure><img src="https://1977539604-files.gitbook.io/~/files/v0/b/gitbook-x-prod.appspot.com/o/spaces%2F5qADNWBPym2Zh4ZaguCE%2Fuploads%2FlrxV2tvHcOCAXPISJz91%2FScreenshot%202026-02-11%20152515%20(1).png?alt=media&#x26;token=89481927-0a7b-4eeb-a53d-19f795a145f1" alt=""><figcaption></figcaption></figure>
